
If you own a business with a parking lot, you need to keep the stalls painted so they can be seen by people using your lot. Sometimes you'll need to repaint the existing spots, and sometimes you might want to completely redo the layout of the lot. Marking out the parking spaces that are to be painted and preparing the lot to be painted can often be just as time consuming as painting the spaces themselves, so make sure you set aside plenty of time for planning when you are ready to redo your parking lot.
Parking spaces in America are usually between 7.5- and 9-feet wide and 10- to 20-feet deep, though individual city codes may define larger parking space widths. A handicap-accessible spot should be at least 8-feet wide and 18-feet deep, and a handicap van-accessible space should be a minimum of 11-feet wide and 18-feet deep. Handicap spaces should also have an access aisle beside them that is 5-feet wide in order to allow wheelchair access from one side of the vehicle. These access aisles can be shared between two adjacent handicap spaces and should be painted in hatch marks to discourage people from parking in them.
For lots with up to 100 spaces, you will need one handicap space for every 25 total spaces in the facility, rounded up. If you have more spaces than that, add one more for each 50 spaces up to 300 spaces and then add an additional handicap space per 100 spaces after that. In other words, if you have 78 spaces, you will need four handicap stalls. For a lot with six spaces, you need one handicap stall. If your lot has 222 spaces, you will need seven handicap stalls. For lots with up to 200 stalls, at least one of these needs to be handicap van-accessible, and larger lots require two of these spaces.
If your lot already has lines marked out and you're satisfied with them, you can just repaint over the existing lines. If not, you'll need to plot out your new parking lot lines. Create a map of your parking lot so you can figure out how to best divide the area. If you're not great with numbers and scales, you may choose to do this in the parking lot itself on a day when your business is closed and the lot is empty.
Decide if you want to create one-way traffic lanes that allow for easier parking but more difficult parking lot navigation or two-way lanes that allow people to enter spaces from either direction. Remember that one-way lanes between the parking stalls may be narrower (12 feet as compared to 18 feet), but the spaces also require around one full space to be sacrificed in order to angle the stalls.
Figure out how wide to make your stalls. You might try to maximize the number of cars you can fit in your parking lot by making the spaces all 8-feet wide, but if you are in an area where a lot of people drive large trucks or if drivers of large trucks make up a large part of your customer base, you may want to give people more space and paint the stalls to be a more comfortable 9-feet wide. You can also choose to make most spaces larger 9- feet wide areas with a few 7-feet compact spaces in order to make the most of your given space.
Once you've planned out the lot, you'll need to buy materials. To do this, you'll need to figure out the linear space of all of your stalls in order to buy enough paint. Multiply the length of your spaces by the number of total stalls of that size to get this number. For example, if you have 23 spaces including one handicap van space, and your stalls are all 15-feet long except for the 18-foot van space, you will need enough paint for 348 linear feet (15 x 22 plus 18).
With this number, you can use a parking space paint calculator online to find out how many gallons of asphalt paint you will need. When buying paint, keep in mind that you can choose to use yellow or white for the stripe color, but you will probably also need blue and white to paint the handicap spaces. You will also need to buy a stencil for the handicap spaces because these markers have legal requirements regarding their size and spacing. You may also choose to buy arrow stencils to direct traffic or stencils to mark space numbers.
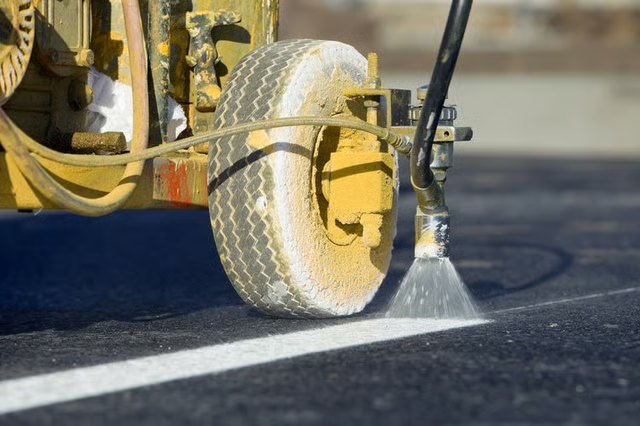
You will then need to decide whether you want to use a paint roller or an asphalt-striping machine to paint the lines. Obviously, a paint roller is more labor intensive, but striping machines are very expensive, even to rent. It shouldn't be too hard to manually paint eight spaces, but if you're doing a large number it might be worth renting or buying a paint striper. If your paint striper doesn't have a hand-held spray attachment, you will still need a roller to apply stencils. If you use a roller, don't forget to also get a paint tray.
If using a roller, be sure to buy enough masking tape to block off your stall lines as well. Generally, you'll need enough tape to equal double the number of line lengths you calculated for paint plus 8 inches per stall in order to cover both sides of the line and each end. In other words, for the 23-space example above, you would need 880 linear feet of masking tape (348 x 2 plus 23 x 8).
You can't paint a filthy, potholed lot and expect the paint to stay on. Use a leaf blower or broom to remove any loose debris and then use a pressure washer or garden hose with a sprayer to spray loose any debris clinging to the surface. Repair any cracks or potholes beforehand with new asphalt or sealant and allow it to dry before moving on to the painting process. You may consider applying a sealcoating to your asphalt to keep it protected and to give it a nice black color that will ensure your lines stand out brightly so they are easily seen.
Finally, when the lot is clean and in good repair, measure out your lines and mark them out. If you are using a paint striper, you may just put a few pieces of tape out to guide you or mark the area with construction chalk. If you are using a roller, mark it off with your masking tape, working to keep the lines straight and leaving about 4 inches of space per stripe. You may want to use a 4-inch piece of lumber cut to the length of your spaces to make laying down the tape easier. Now, you're ready to paint.
Tips for painting a parking spot will vary based on whether you are using a roller or a paint striper. If using a roller, for example, you might use a piece of lumber to guide you and make sure your lines stay straight. Paint stripers are specifically designed to ensure the machine goes straight, so masking tape is unnecessary. This can be useful when painting a massive parking lot area. To apply the handicap stencils, use the paint striper's hand-held sprayer or use a paint roller. Do the blue background stencil first and the white detail stencil next. No matter what painting method you use, be sure to allow the lines at least 30 minutes to dry before removing the tape and opening the parking lot to traffic.
